Shared Access
UniOne offers great collaboration features for your email marketing. You can let your designer manage templates, provide marketers with statistics, and give network admins access to domain settings.
Types of access
Several types of access are already defined: administrator, developer, tech support, marketer, accountant, designer, client and customized. Let’s take a closer look at each of them.
Administrator
Maximum access rights. This role has control over every available setting, except the primary email address and password.
Developer
Similar to Administrator, but some settings are read-only, such as account details, payment settings and tariff.
Marketer
This role grants access to all pages under Tools and Statistics menus. This means a user will be able to work with templates, assess deliverability rates, download event data in CSV (including email addresses), examine delivery problems and manage address statuses.
Tech support
The Support role has the exact same rights as the Marketer described above, and can also access Settings in read-only mode (the API key will not be displayed).
Accountant
This role has full access to tariff, balance, and payment history information, and can also change the tariff plan. The Accountant can view statistical data, but CSV download is not available.
Designer
The only option available for Designer is to view and edit templates in your account.
Client
This role grants access to Statistics only, including the ability to download data.
Customized
If for some reason none of the roles described above fits your particular needs, you may set custom access permissions by checking the options you want to grant.
How to set up shared access
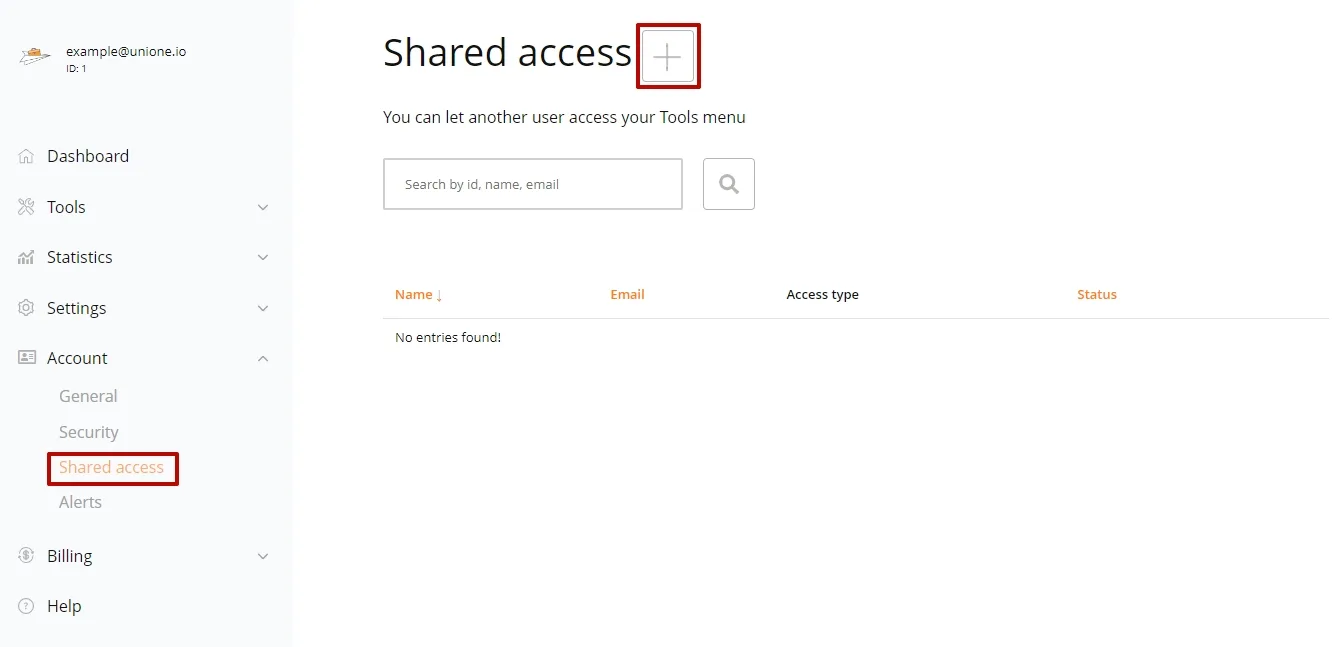
Click the menu button, navigate to Settings – Shares Access and invite a new collaborator by clicking the plus sign.
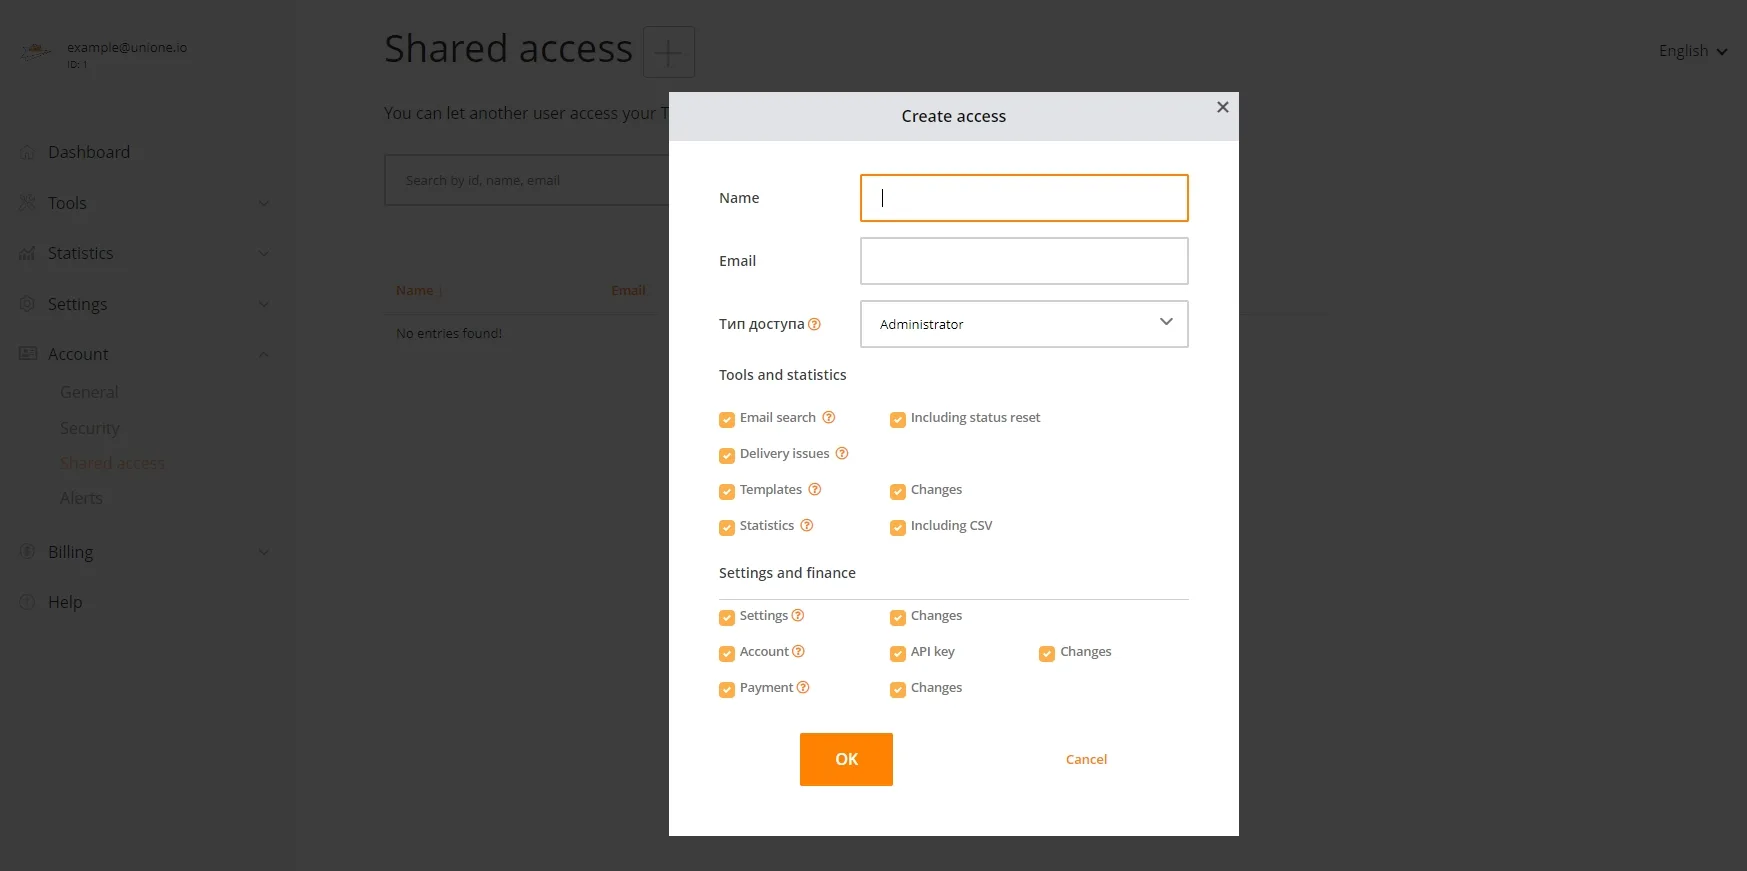
In the dialog box you should specify the new workgroup member’s email address, and set the allowed rights. If the Readonly box is checked, they will be able to view the data without making any modifications.
After clicking OK, the person will receive a confirmation email. If your addressee does not have a UniOne account yet, they will be prompted to create one.
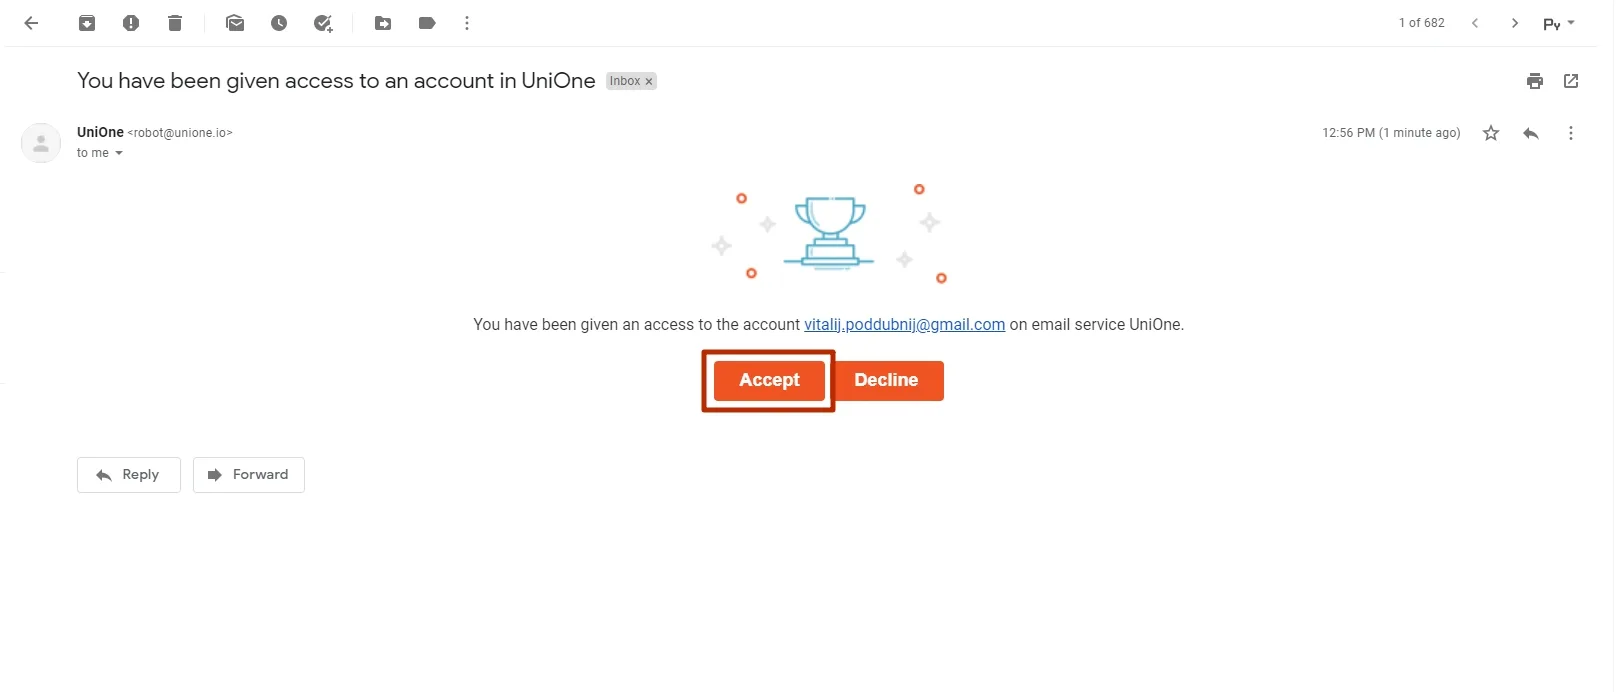
By clicking the confirmation link (and completing the sign-in process, if necessary) the person will receive the capacity to switch to your account by clicking the corresponding option in the top left corner.
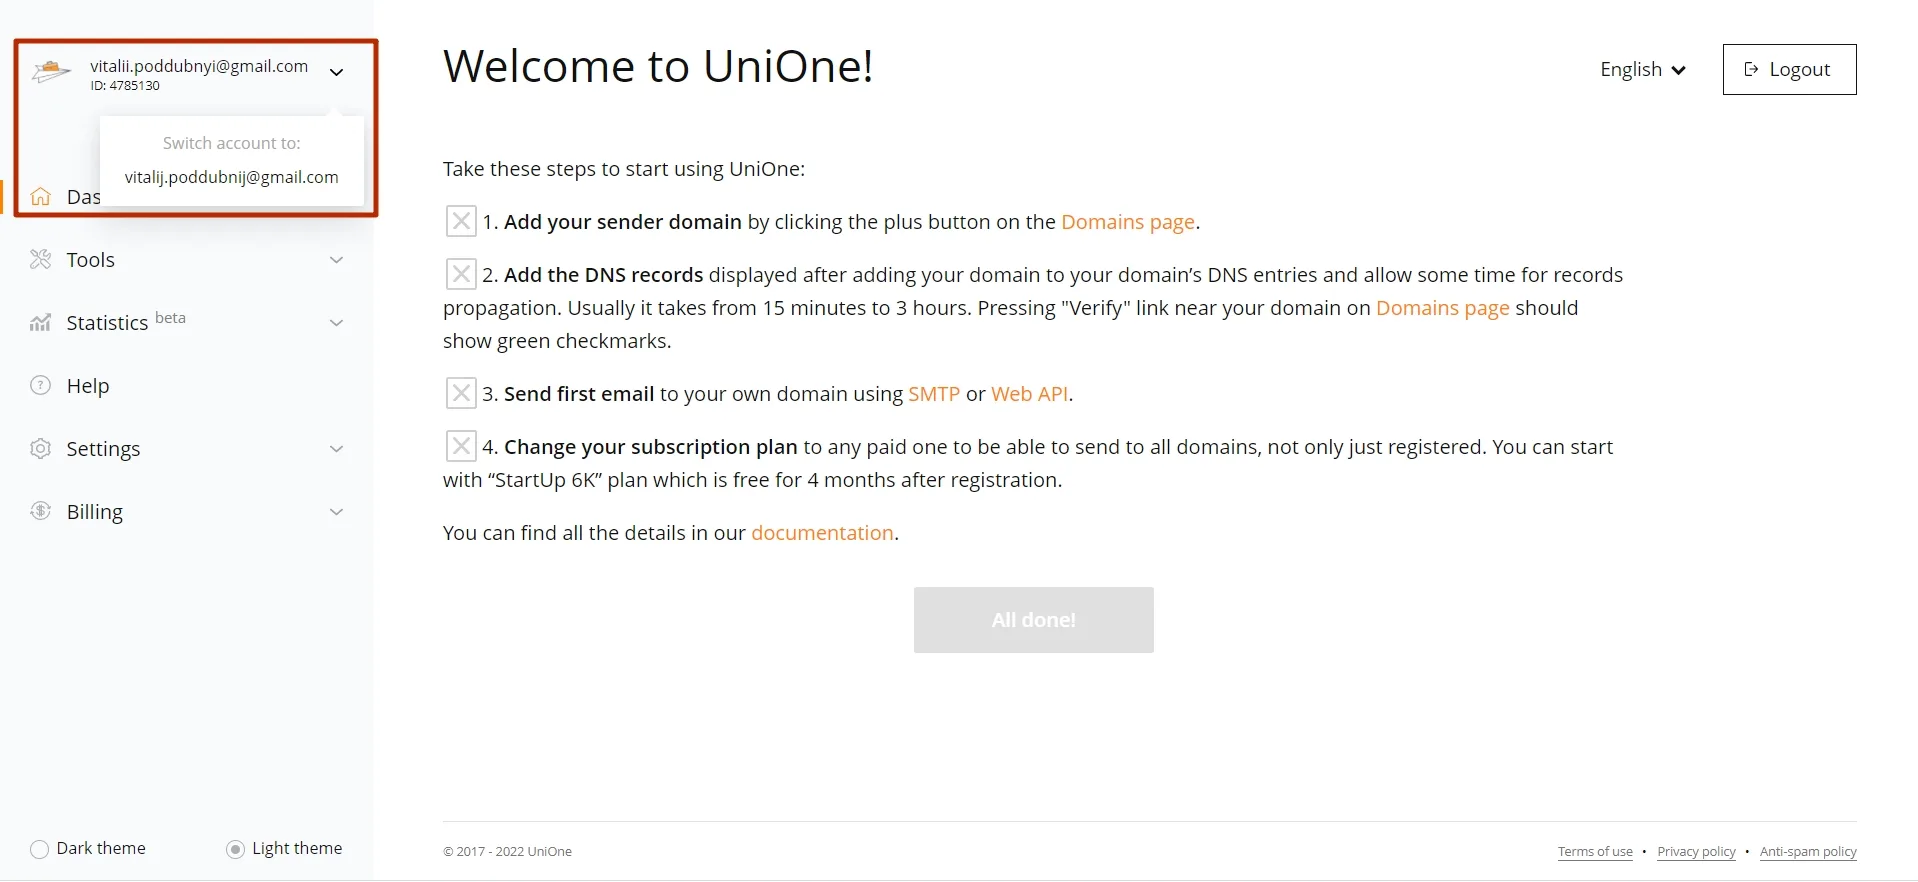
Your colleagues will see only those menu items you’ve granted them access to.
Modifying and disabling a share
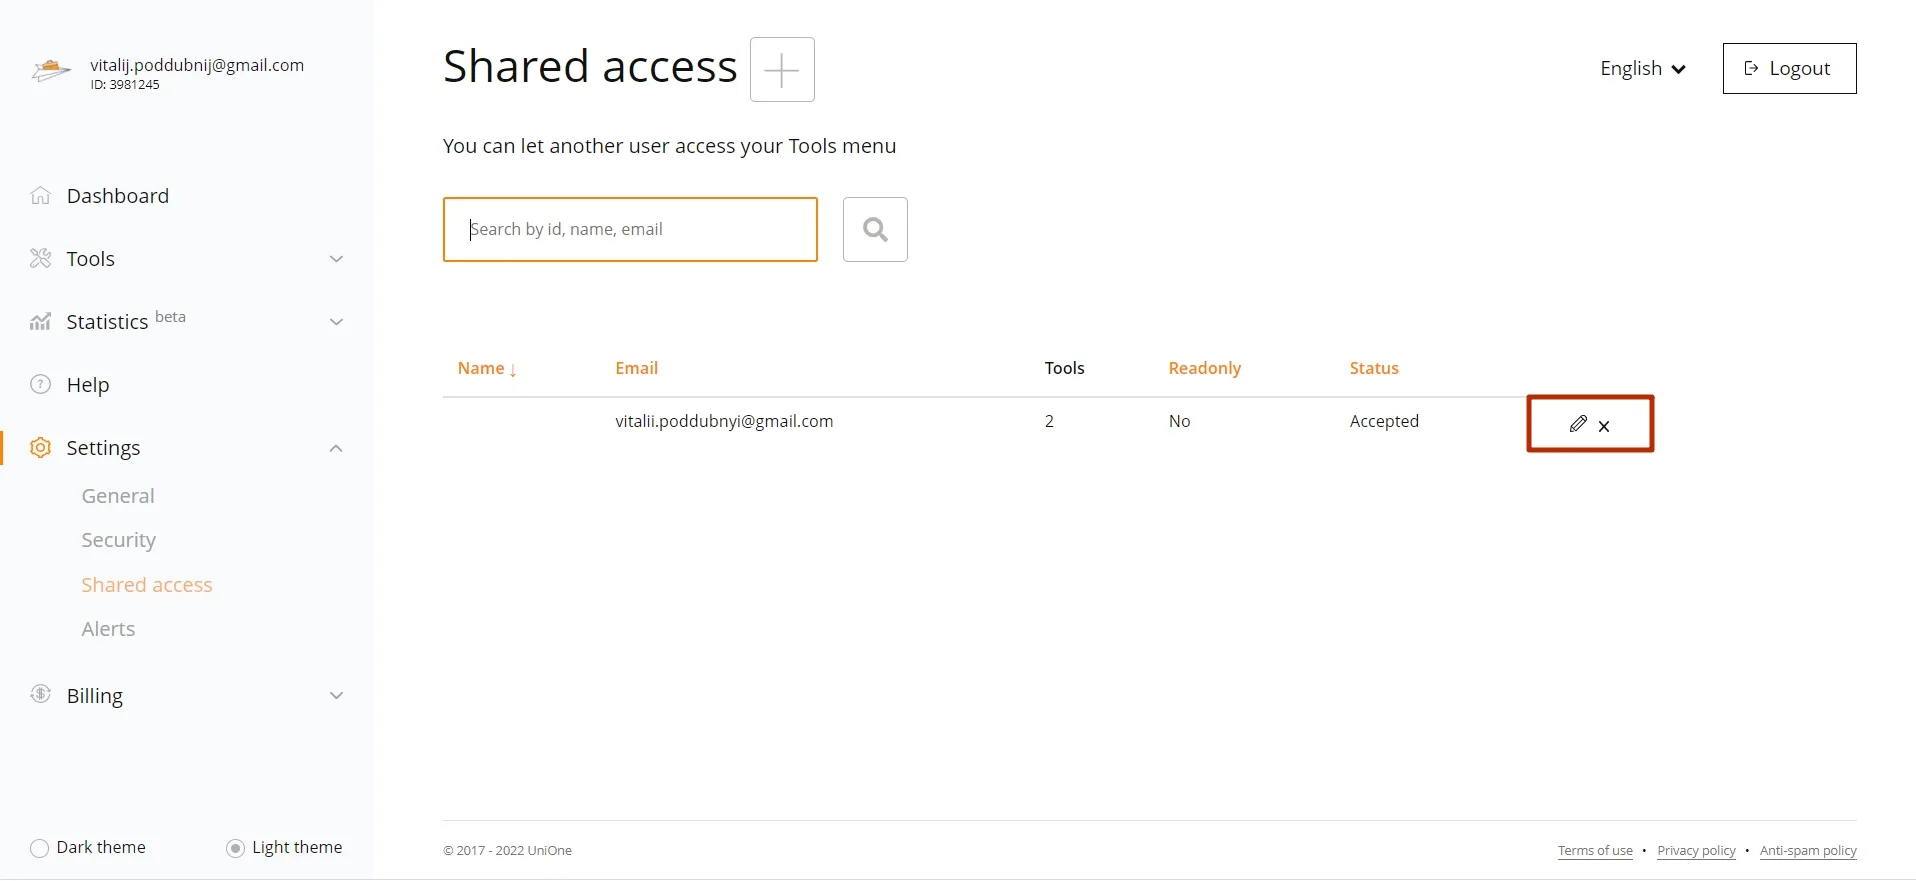
To add, modify or revoke previously given rights, you click on the pencil icon for the corresponding share. By clicking the cross icon, you permanently delete the person from the list. If you want to restrict their rights only temporarily, simply uncheck all boxes – this way you won’t need to create the entry anew.