
Custom unsubscribe page
The custom unsubscribe page feature allows you to create your own unsubscribe page design, following the corporate visual style of your company. Besides emphasizing professionalism, it also shows how much you value your customers.
On such pages, you can place a short survey to find out the reason for unsubscribing (like “Too many emails”, “Not interested”, “I did not subscribe”). This data will help you optimize your mailing strategy and make your campaigns more effective. Other personalization features are also available.
To configure the unsubscribe page, go to “Settings → Unsubscribe pages”.
On the opening screen you'll see the following:
- Search field:
- If you have multiple unsubscribe pages, you can look up the one you need by its name
- Standard unsubscribe pages, set by default:
- “system standard” – with more flourish,
- “system simple” – with minimalistic design.
To create a custom page, click “+”. A form for customizing the appearance of the unsubscribe page will open.
Let's go through the settings available.
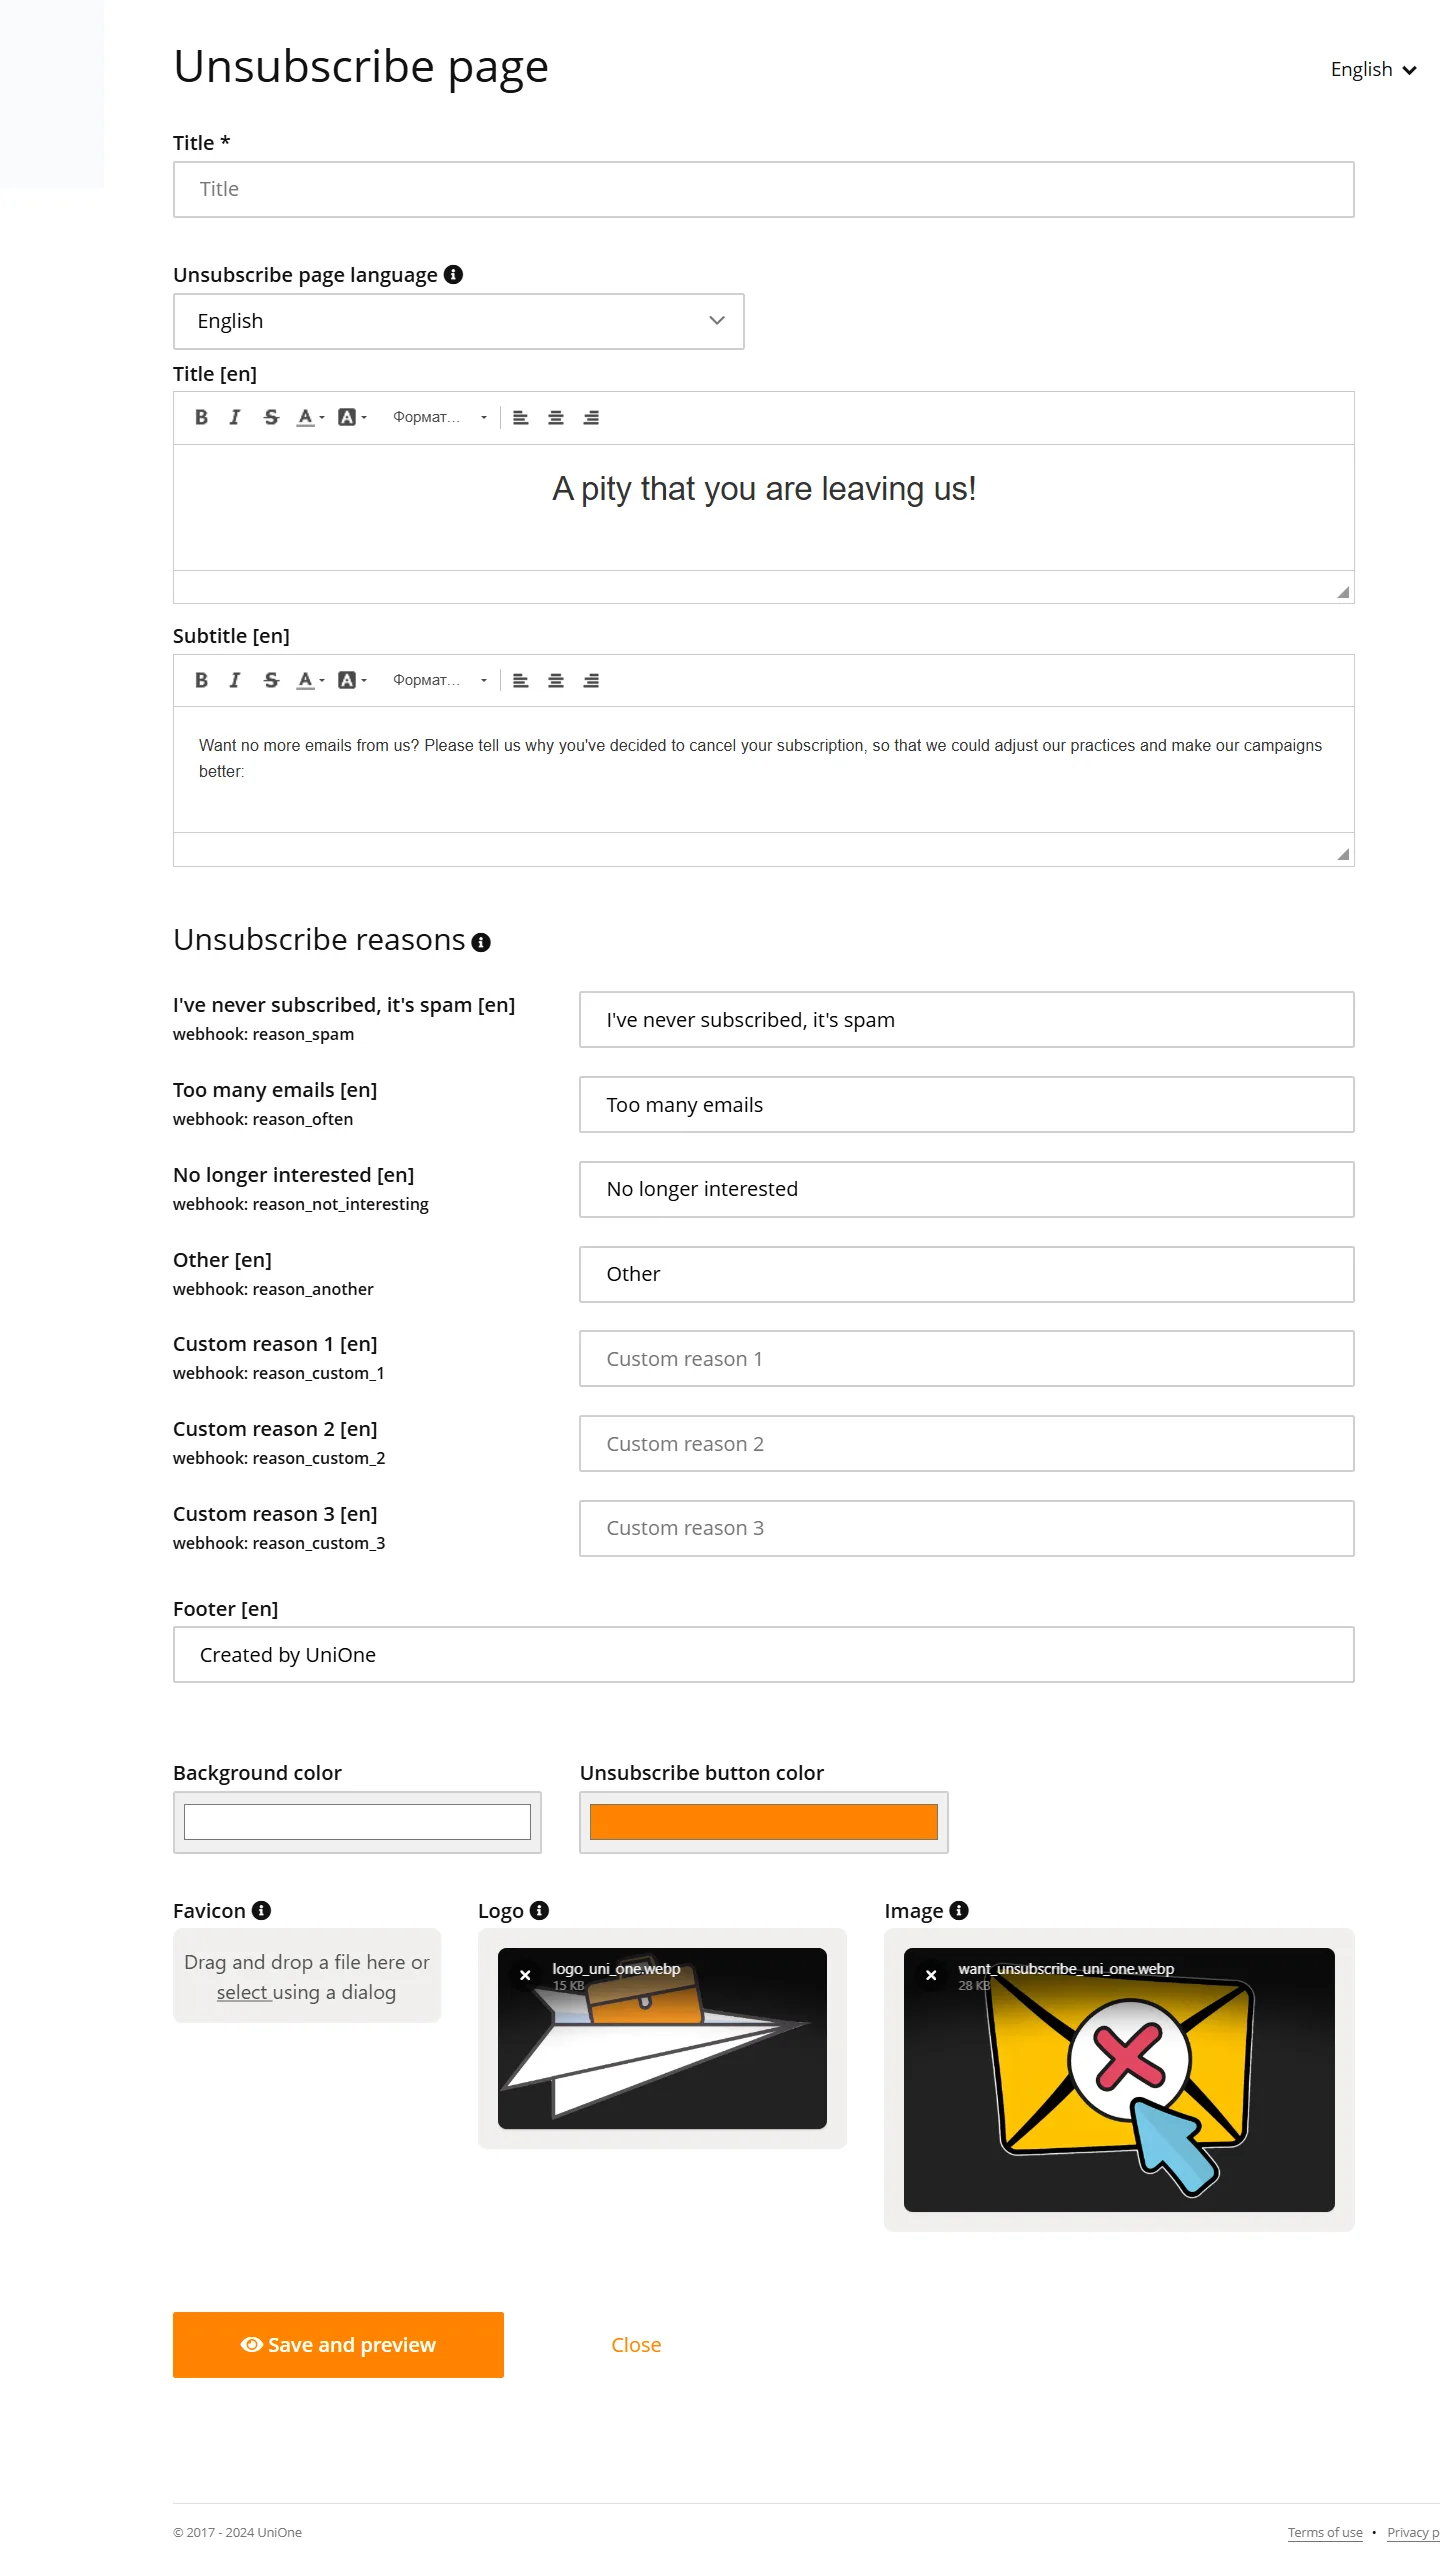
Fields to fill in are:
- Title (required): will be displayed in the list of pages.
- Language: select the language setting for viewers (you may add different language versions of the same unsubscribe page).
- Headline and subheader: text shown to subscribers (may be left blank).
- Unsubscribe reason: list of possible reasons (you can also add custom reasons). If empty, the block will not be displayed.
- Footer, background, button color: design settings.
- Favicon, logo, image: visual elements for corporate identity.
After filling in the values, click “Save and view” to preview.
A preview of your unsubscribe page will be shown.
Here you can see how your page looks and switch to any of the languages for which you've filled in the values during setup. You can also evaluate how your page will look on different devices: desktop, mobile, or tablet.
How does the unsubscribe page work?
Even though it's called a “page”, it actually consists of four pages, connected by transition logic:
- Before unsubscribing — the main page.
- Resubscribe — the subscriber can opt to join the mailing list again.
- After resubscribing — confirmation of resubscription.
- After a complaint — displayed when clicking “complain”.
After you have created your unsubscribe page, it will appear in the list of unsubscribe pages.
Here, each row has icons for available actions on the right-hand side:
- "Eye" — preview the page.
- "Star" — set the selected page as default.
- "Pencil" — edit the page.
- "Cross" — delete the page (you'll be asked to confirm deletion). If the page being deleted is currently in use, “system standard” page will be used instead.
Technical details
- When you send an email via API, you use a specific URL for the request, for example: /en/transactional/api/v1/email/send.json.
This link specifies the language version (in this case, "en" for English). It defines in which language the recipient will see the unsubscribe page for this email -- unless a different value is specified as the global_language parameter in the request.
To make things more clear:
- If the API request URL includes /en/, the unsubscribe page will be in English.
- If the request includes an explicit value for global_language, the page will be displayed in the language set by this parameter, and not the language from the URL.
- The unsubscribe reasons can be obtained either via webhooks or by using the event-dump API method.
- If someone issues a complaint about an email, their address will be marked as "complaining". After that, no more emails will be sent to this address. Such addresses can be un-suspended only by contacting our support, or if the user themselves follows the unsubscribe link and subscribes again.
- If a user has multiple projects, they can create separate unsubscribe pages for each project. This allows them to customize the pages to suit the needs of each project. However, when a new project is created, it will be associated with the default unsubscribe page of the main account.
